Do you think you’re a real entrepreneur? In that case, you must integrate the Google Tag Manager with your Shopify store. After all, it may improve your traffic as well as sales.
The GTM analytics tool provides an opportunity to track, add, and update tags. It improves conversion, getting more precise tracking data and site analytics.
In this way, you can know when and whom to remarket to.
Altough there are ways to track activity across different stores and apps, GTM tool can change tags for you anytime And guess what? It will only take a few minutes to do so.
The integration of Google Tag Manager with Shopify is not as easy as it is with other apps. But hey, it’s definitely worth doing it as this would be just one more aid that you can have in the constant pursuit of optimizing your marketing strategy.
Anyway, let’s go on a journey together so that you can learn the best ways to integrate GTM with your eCommerce store.
Table of Contents
9 Steps for Google Tag Manager Shopify Integration with Shopify Settings
From now on, I’m gonna tell how to implement Google Tag Manager through the Shopify admin page. If you think it’s techy, it’s not, so just follow up!
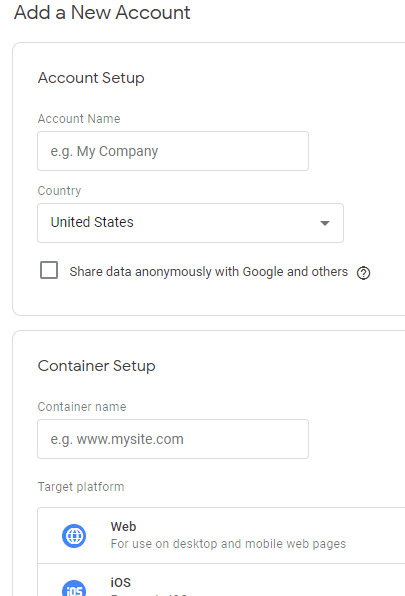
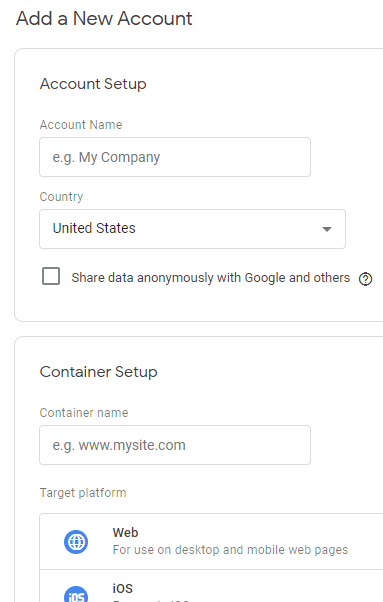
- Create a Google Tag Manager account in case you don’t already have one.
- From the Google Analytics page, go to Property.

- Click on “Tracking Info” and “Tracking code” and copy your Universal Google Analytics script.
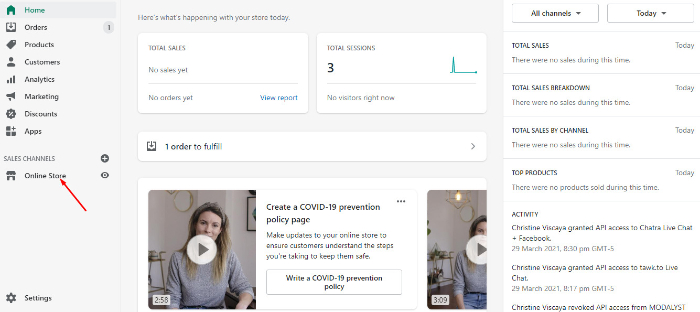
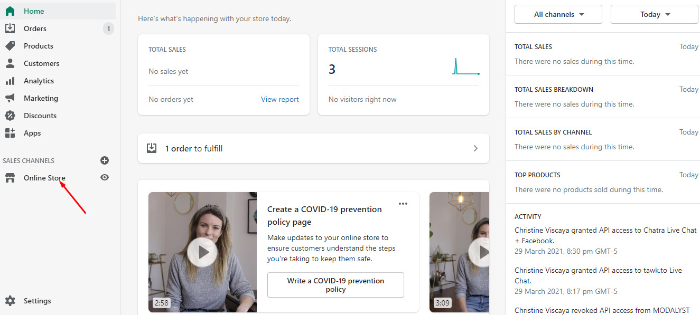
- Log in to your Shopify website and head to “Online store”.
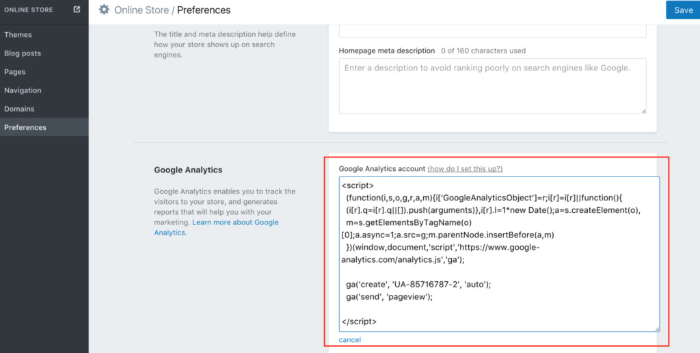
- Choose the ‘Preferences’ option from the left sidebar and scroll down till you see Google Analytics tab. Go ahead and paste the Google Analytics website tracking code in the given space.
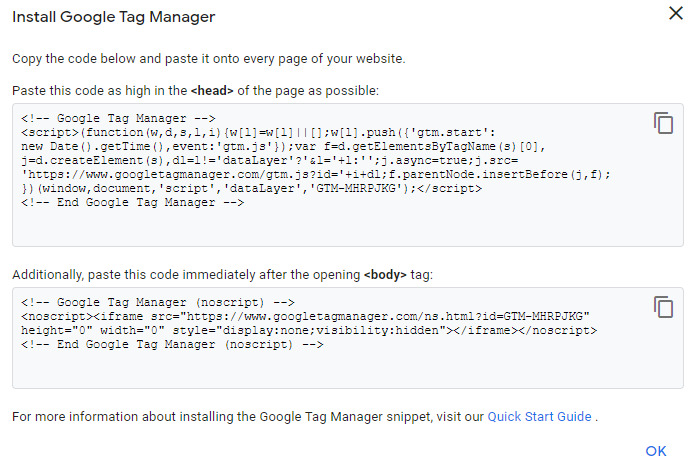
- Head over to your Google Tag Manager admin and copy your GTM snippet (remember to copy without the first and the last <script> and </script> tags).
- Return to your shop and go again to “Online Store.”
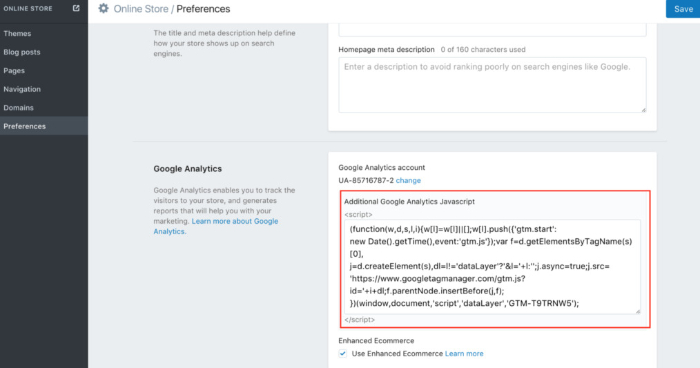
- Go to preferences then look for Google Analytics again, choose “Additional Google Analytics Javascript” and paste the copied script.
That’s it, you’re done!
One thing to keep in mind is that if you have a browser that supports JavaScript, you shouldn’t worry about the GTM <noscript> that they ask to be put in the body <body> of your website. That’s only done for the small number of browsers that don’t utilize JS.
If you want GTM to work on both types of browsers, you will have to integrate GTM through the theme file updates.
This process, I just outlined for you above will work for all pages on your store, including the checkout one.
However, remember that this implementation simply gets the basic GTM code running on your website and that doesn’t include the data layer.
How to integrate Google Tag Manager with Shopify Theme option
Let’s take a look at another way to implement GTM for your Shopify store.
Unlike the previous steps, these ones are a tad bit more complicated and can take a few more minutes.
- Create a Google Tag Manager account.
- In the signing up process, you will give two codes like these. Keep going.
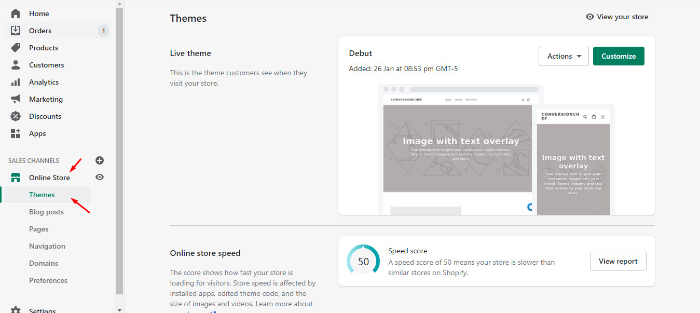
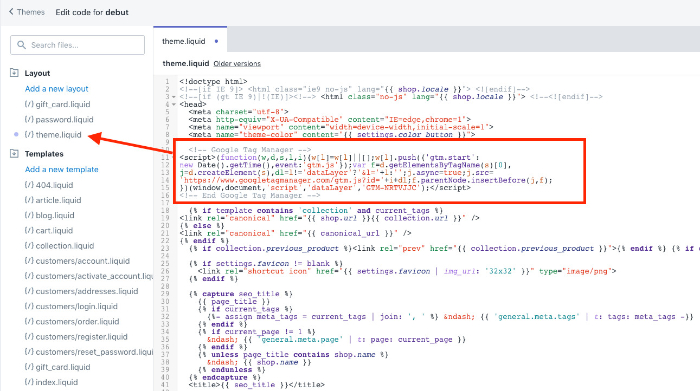
- Login to Shopify, select ‘Online Store,’ and go to ‘Themes.’
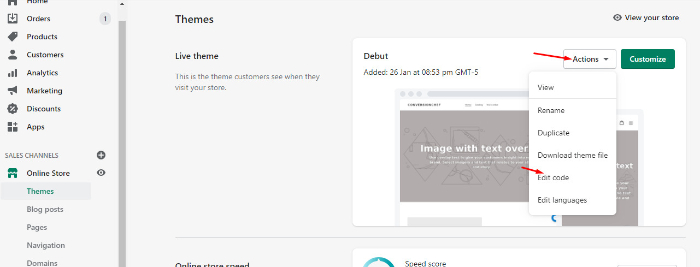
- Click on the ‘Actions’ drop down and choose ‘Edit’ code.
- Copy your first Google Tag Manager script for <head> section.
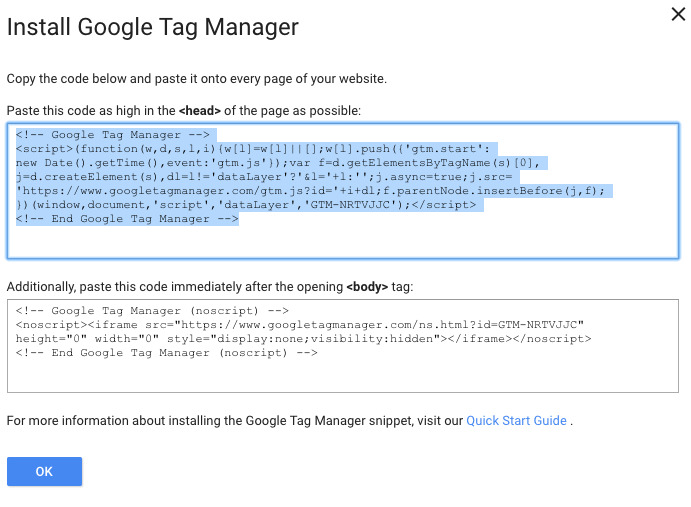
- Paste it to your theme.liquid at top of the <head> tag.
- Afterwards, copy your GTM noscript that is – <body> tag.
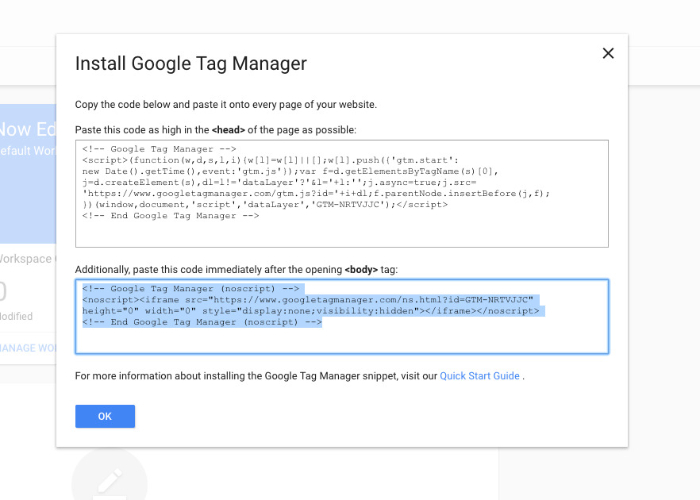
- Paste it into your theme.liquid at the top of the <body> tag.
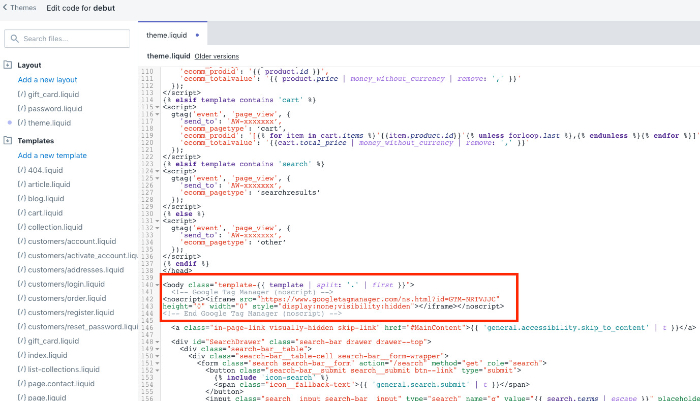
- Click on “Save” and you’re done.
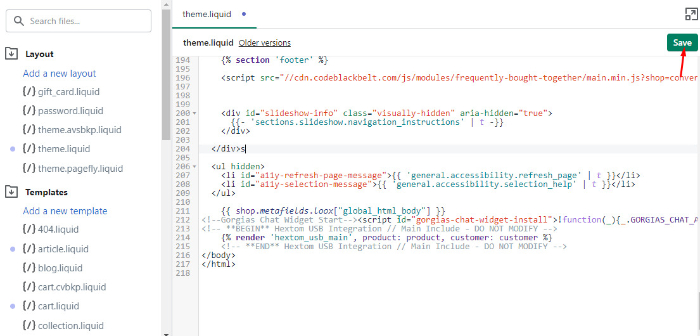
A Pro Tip: If you’re on the Shopify Plus platform, you have to do the same step for your liquid.theme file as well.
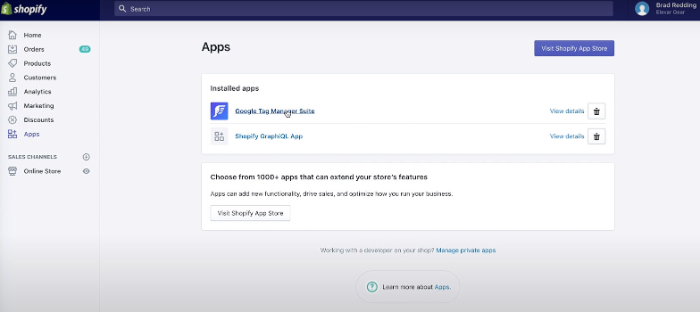
Google Tag Manager Shopify Integration with App
As you can see, the integration between GTM and Shopify is not as seamless and as easy as what we’re used to with other platforms.
One helpful group of software developers decided to build an app that’s dedicated to integrating GTM along with all of the other data layer variables needed for dynamic remarketing.
- Go to your Shopify app store and look for Google Tag Manager Suite
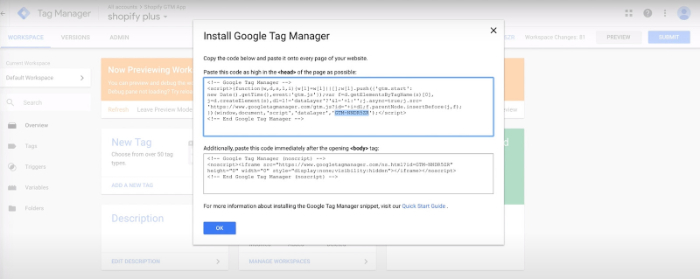
- Go back to your Google Tag Manager and copy the GTM code as shown below.
- Return to Shopify, go to the settings of the GTM application, and input your container ID. Once done, click on “Save and update.”
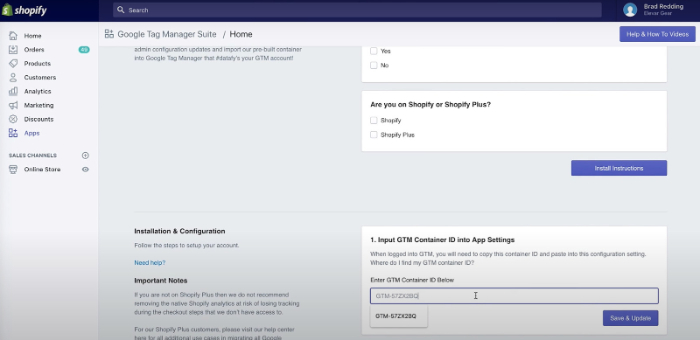
- You’re ready! The tool is now configured and working. If you want to utilize the GTM app for more advanced behavior events or site speed management, follow the next steps.
- First, make sure that your Google Tag Manager is working with the app. For that, go to your GTM page and add a new ‘Universal Analytics’ tag with the ‘Event Track Type’ and mark the ‘All Pages Trigger.’
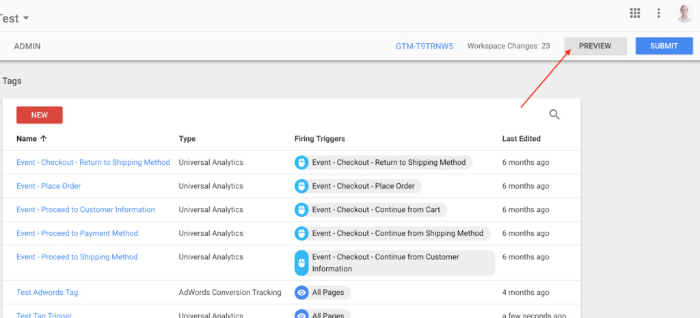
- To enable the Preview mode, click the “Preview” button in the top right corner of your GTM Workspace.
- Go to your Shopify store URL. Right there, you should see the GTM debug console at the bottom of the page, displaying the tags.
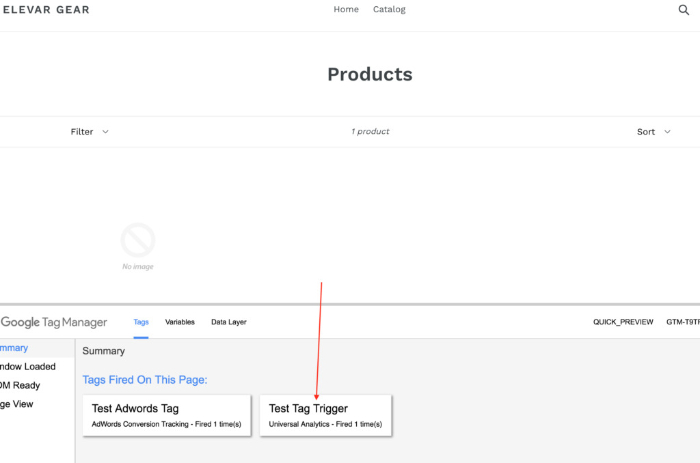
- You should also see whether the tag is showing on your checkout pages as well. If it is, remove the test tag and start creating your own.
The Bottom Line
For me, the best method would be through Shopify Settings. Although it takes a bit of work and configuration, it works well and it’s the easiest one to do in my opinion.
The option to do it through the theme has one great benefit – it can be used with stores on Shopify Plus and that is a bonus.
As for the application, it’s the easiest way of integration and it also gives you plenty of other options you can utilize. The only downside of it is that it has a monthly fee of $50 which can add to your additional costs. If you’re a small business or a start-up, you may not be able to afford that.