Honeycomb upsell funnels Shopify app is a great way to increase your ROI. You can upsell and cross-sell several products creating stunning customized funnels.
By inculcating upselling, you will be able to reach the goal you set for revenue generation. If you’re not aware of the potential Honeycomb upsell funnels Shopify app has, let’s just see what it can create and how you can customize its funnel for upselling.
So let’s get started!
Table of Contents
What KIPs Can We Analyze on the Honeycomb Upsell Funnels Shopify Dashboard
As you can see, the dashboard of Honeycomb Upsell Funnels Shopify app. From here, you can analyze up to 4 key performance indicators.
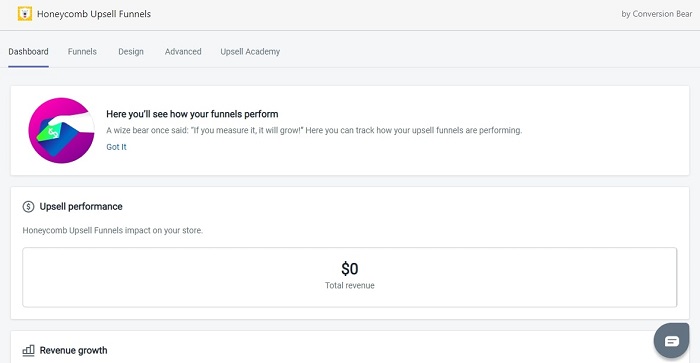
In addition to this, there are several metrics that you might wanna consider before using this app.
- Upsell Performance: Shows the total revenue in USD
- Revenue Growth: Gives you a graphical representation of daily revenue generation
- Funnel Views: Have an overview of revenue generated by each active funnel
- Top Converting Funnel: Shows which funnel generated the most revenue
How to Create A Funnel in Honeycomb Upsell Funnel Shopify App
The ‘funnel’ section in the app lets you create funnels for upselling and cross-selling of products. When you click on the ‘funnels,’ the first screen you see is the dashboard, where you can view statistics of already active funnels.
Let me show you a step-by-step go through on how to create a funnel in Honeycomb upsell funnels Shopify app.
Step 1: Click on the “New Funnel” button at the top right corner of the screen.

Step 2: A screen would pop up asking you several details to create a funnel. Put your funnel name and type and you’re good to go.
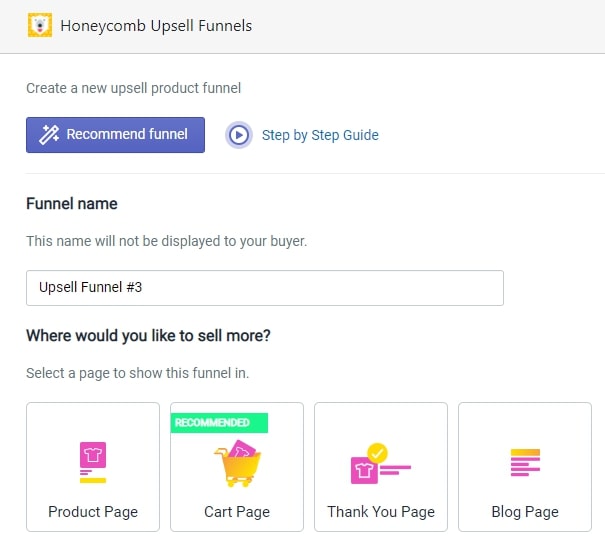
Step 3: Hold on! Choose a page to show the funnel on. From my perspective, the Cart Page is something you might wanna choose. However, pick whatever suits your needs.

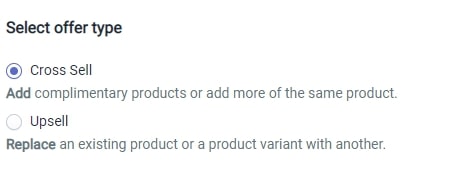
Step 4: Select offer type – upsell or cross-sell.
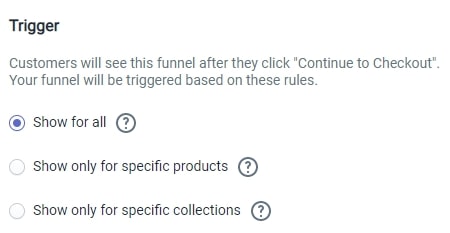
Step 6: Select the trigger you want from the list.
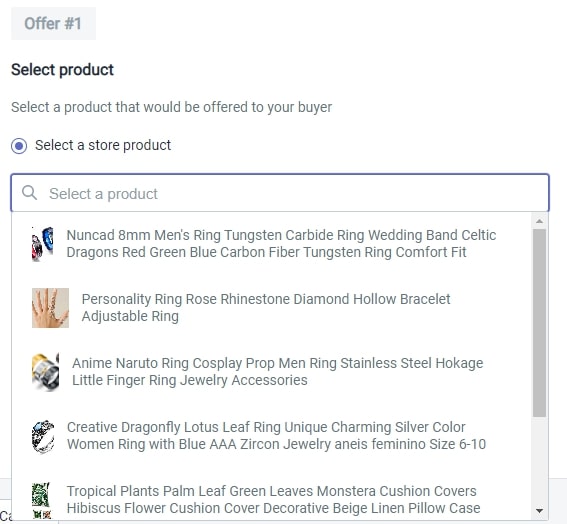
Step 7: Add upsell/cross-sell offers to the funnel. You can show up to 3 offers in each funnel that would be displayed one after another.
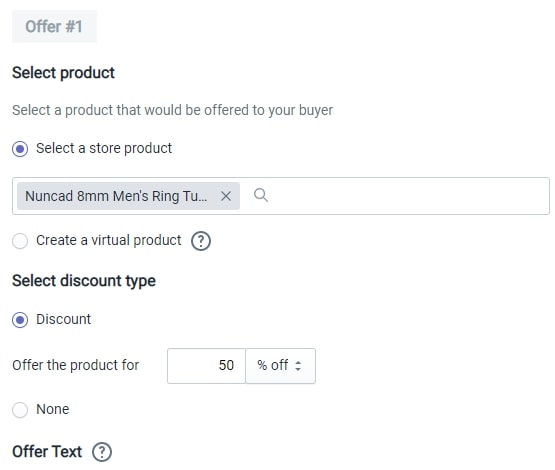
- Firstly, select the product you wanna upsell/cross-sell from the product drop-down list.
- Select discount and give away some if you want
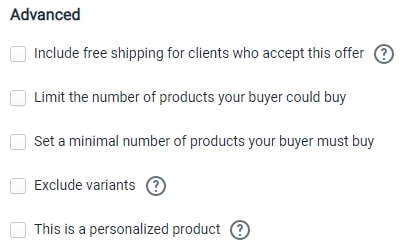
- Choose the ‘Advanced’ options if applicable to the product.
- Repeat the process 2 more times if you have 2 more product, clicking on “Add another offer”

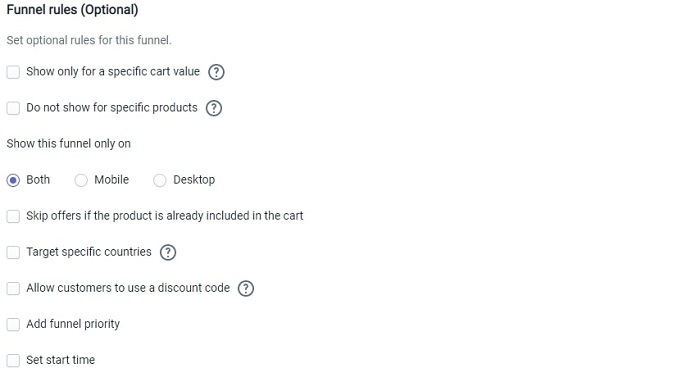
Step 8: Scroll down to Funnel rules to make your funnel specific. As you know, the importance of specificity in marketing is quite astonishing. So choose the options you want your funnel to have. Once you’re done with funnel creation, click on the “Save & Activate” button at the bottom right corner.
Craft Your Funnels with Honeycomb Upsell Funnels Design Option
The design option lets you customize the visual parameters of the funnel. Here are a few things which you can customize in the Design tab:
- Change the theme from the given options
- Set background, text, and top background color for Upsell page
- Set text size, background color, text color, and font for top bar
- Customize the countdown timer’s time, text, color, and text size
- Customize the color and text of price displayed in the funnel
- Add a discount coupon if you feel like giving one
- Put other miscellaneous text
- Preview the funnel and see if you’re good to go
Give Your Honeycomb Upsell Funnels An Edge with Advanced Editing Features
Here are a few more parameters you can tweak and polish your upsell/cross-sell funnel:
- Shopify Post purchase upsell orders: If you have a ‘Thank you’ page funnel activated, you can create an upsell offer for a buyer, and it would be like creating 2 consecutive funnels.
- Pixels & tracking: Connect Facebook, Pinterest, Snapchat & Google pixel to your funnel.
- Custom CSS and Javascript: Edit your funnel with CSS and Javascript.
- Notification: Enable or Disable the email notification after every upsell/cross-sell you make via the funnel created.
- Custom trigger selectors: Add custom button support to trigger your funnels.
Watch Videos and Know More About Honeycomb with Upsell Academy
In the Upsell academy section, you will see 3 videos that talk about the app and educate about funnel creation & optimization.
You can view the videos and watch the demo funnel for a Single product page, general store, or niche-specific store to get the idea of an upsell funnel, in case you’re a beginner.
There are a few FAQs already that might answer for some of your troubles.
How Much Does Honeycomb Upsell Funnels Shopify Cost?
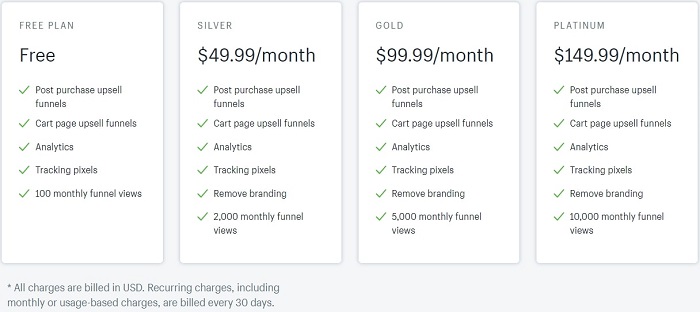
The app comes with free as well as 3 paid plans. You can always start with the free version. If you like it and want more features, you can upgrade to the paid version of the app. As you can see here, the paid plan consists of Silver, Gold, and Platinum. With any of these plans, you can get a 7-day free test drive 😉
Is Honeycomb App Worth Trying?
When it comes to expanding an eCommerce business, Upselling is a crucial element that any serious store owner would focus on. With the app’s great built and custom features, you can create some stunning funnels for your customers.
If you do it right, the increase in revenue is a sure thing with Honeycomb Upsell Funnels.
I would suggest you get used to the platform with a free trial. If you don’t like it, go for some other app like Reconvert upsell. But, if you like the app, it would be smart to upgrade to a paid plan to get the app’s maximum benefit.
