If you’re looking to have a break into eCommerce in 2021, you should know how to add products to Shopify, which is one of the most popular eCommerce platforms out there. It powers more than 800,000 businesses so far and it shows no sign of slowing down.
Shopify has an impressive global outreach. And it seems that Shopify is on its way to fulfill its mission of becoming the first global retail operating system in the world. It’s a place where individual sellers, small businesses, and big names in the industry can all come together under one umbrella.
In this article, we’re going to give you more beneficial insights on the platform and walk you through on how to add products to Shopify.
Table of Contents
How to Add Product to Shopify Store – The Simplest Method
In 2004, three Canadians had a very bad experience with online stores. So they decided to do something about it and built Shopify, which went from just an eCommerce tool to a $10 billion global ecosystem. Not only this, they built a system that helped entrepreneurs across the world setup a store and add products to it. Do you wanna find out how easy it could be? Sure, let’s go!
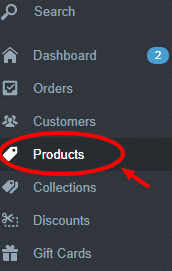
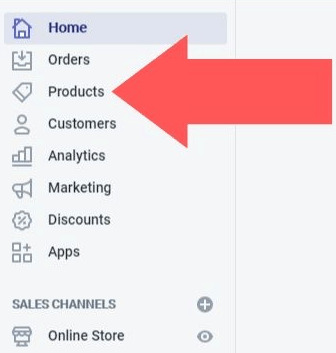
- The first thing you need to do is to go to the bar on the left side of your page and select Products.
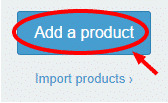
- After you click Products, click on Add a Product.
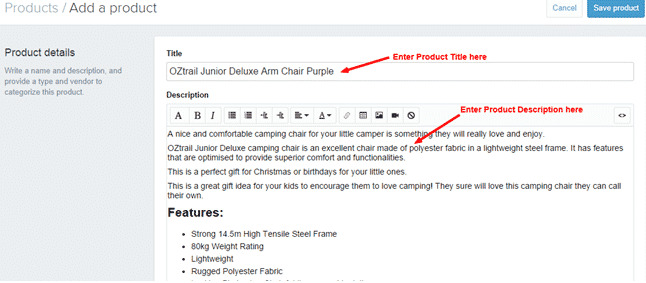
- The next step is to fill in the details of your product. The information you will need is the title of your product, the description of your product, which type of product it is, and the vendor associated with it. This information is a crucial step in knowing how to add products to Shopify. Alongside this, look at some of these best practices that you can follow for adding a product to Shopify:
- The product title should follow a consistent format with all of your other product titles
- Don’t add unnecessary words like ‘new’ because search engines will see it as part of the product title
- Try not to change your product title to prevent unintended changes to the product URL
- Include keywords in your product title so that it can be found through search engines
- Try not to use punctuation in your product title
- Try to choose a title that describes your product the best
- Include every relevant detail in the product description like features, specifications, etc
- Format the description well and avoid writing a wall of text
- Keep the description interesting and entice the viewer to buy the product
- Double-check for errors in the description and don’t copy-paste from other sites
- Include keywords in your description
- Keep the type of product exact, concrete, and precise
- Credit your manufacturer and supplier in the vendor section
And yes, enter your product name and description like this:
Fill up the type and name of vendor:

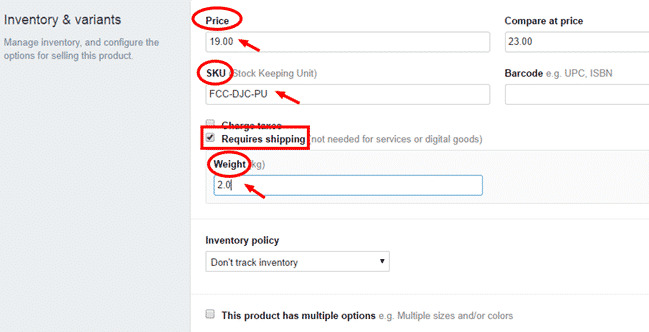
- You’ve pretty much learned how to add products to Shopify, let’s just see how we can play around inventory variants and other crucial things that belong to shipping. As you can see in the picture, you can add the price, SKU, the shipping option, and weight of your product.
The best practices you should remember for this step are:
- There’s no need to add currency here because that’s all will be set up inside General Settings
- SKU means Stock Keeping Unit which you can get from your supplier or the manufacturer’s website
- Google for your product’s SKU but leave it blank if you don’t find it
- Select Charge Taxes and Required Shipping
- Leave ‘Requires Shipping’ unchecked in case you have a digital product
- Add the weight in kilograms
- Don’t forget to add weight because it’s necessary to calculate the shipping cost
- Select Compare a Price and add a high competitor price to show that your product is economical
- Activate a Fulfillment service and select this option
- Select Inventory Policy to track your inventory
- Select multiple options to give the options of size and colors
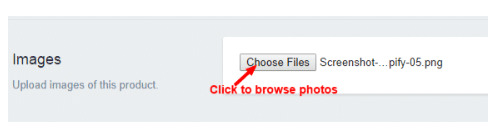
- When it comes to adding pictures, here’s what you need to know:
- Shopify doesn’t show pictures in thumbnail view so make sure you name them properly
- Save all of your pictures on your computer in an organized way
- Don’t dashes and underscores instead of spaces for image names
- Make sure to use high-quality images
- Show your product from all relevant angles through multiple pictures
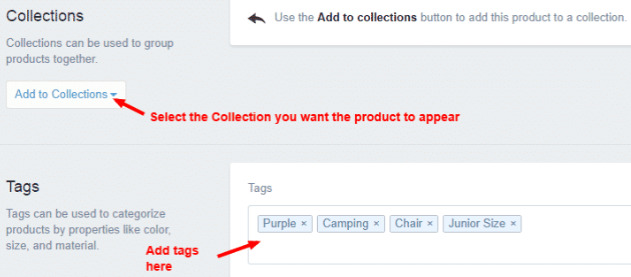
- Add the product to your collection and select relevant tags.
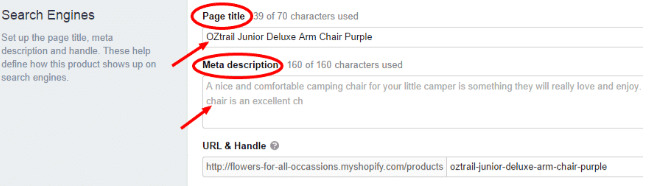
- Shopify automatically generates MetaData. But, you can alter it by adding relevant keywords.
- The last step is to click on Save Product and then select View it on your website.
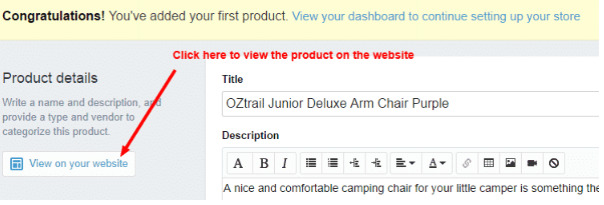
And that’s how to add products to Shopify directly in the simplest way!
How to Add Products to Shopify from Other Websites
If you already have products on other sites like Aliexpress and Amazon, you might not want to go through the whole process above. And luckily, you don’t have to as there are ways around that. Here’s how to add products to Shopify from other websites:
How to Add Products to Shopify from Aliexpress
One of the best platforms to source products for dropshipping services is Aliexpress. Aliexpress uses many of the same suppliers that Amazon and other eCommerce platforms use. It’s easy to source your products on Aliexpress and sell them on Shopify to earn a good profit. There are 2 methods to add products from Aliexpress to your Shopify store:
- Oberlo is a Shopify app that lets you add products via AliExpress. To know what else it’s capable of, read this guide: What is Oberlo And How Does it Work for Dropshipping?
- Another method is to directly visit Aliexpress website and leverage Aliexpress dropship center. I guess it’s your lucky day because I’ve written about this as well. Just go through this guide: How to Use AliExpress Dropship Center
Importing Products from Amazon to Shopify Store – Zonify
Zonify is a useful app that you can use to import products from Amazon to your Shopify store. It’s user-friendly and makes the entire process easy and quick. Here’s how to add dropshipping products to Shopify via Zonify:
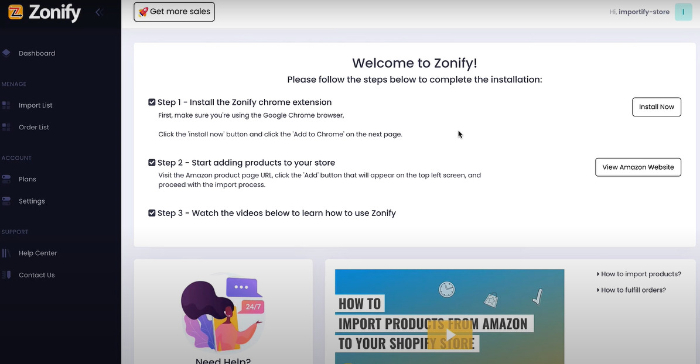
How to Use Zonify to Add Products to Shopify Store
If you’re new to Zonify and just learning your way around it, then don’t worry we have a small and simple step-by-step guide for you that will make your learning journey a walk in the park.
When someone places an order on your Shopify store, you need to fulfill it. You will receive a payment via your Shopify account. In that case, you’re gonna order the product from your supplier and deliver it to your customer. If you have a subscription to the premium plan, you can use the semi-automatic order fulfillment feature.
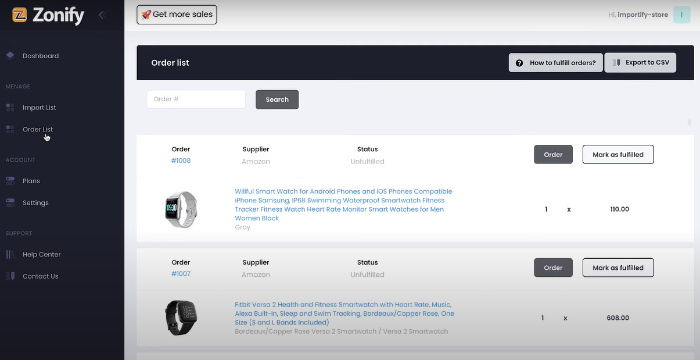
Follow these steps to add products on Shopify through Zonify:
- Go to the Zonify dashboard and select ‘Order list’ from the side menu. All the products that Zonify imports will appear here.
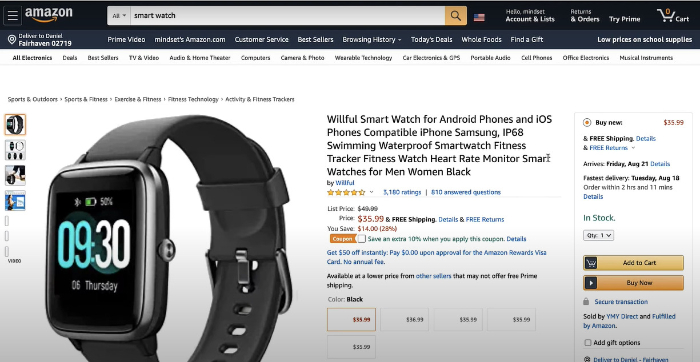
- Search for the order that you will like to carry out and then click on the Order button. Zonify will now redirect you to the amazon site from where you can get the product.
- Add a variant to the cart. Although Zonify will also automatically pick the exact variant for you, in case it’s unable to find an exact match for your order’s variant among amazon variants, you have to manually choose the variant.
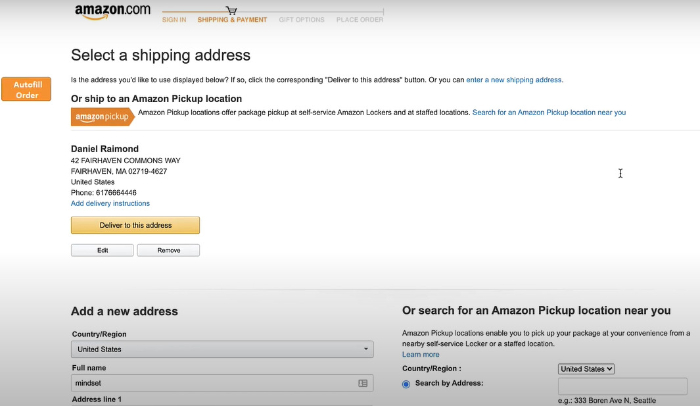
- After picking out the variant, the checkout page will open.
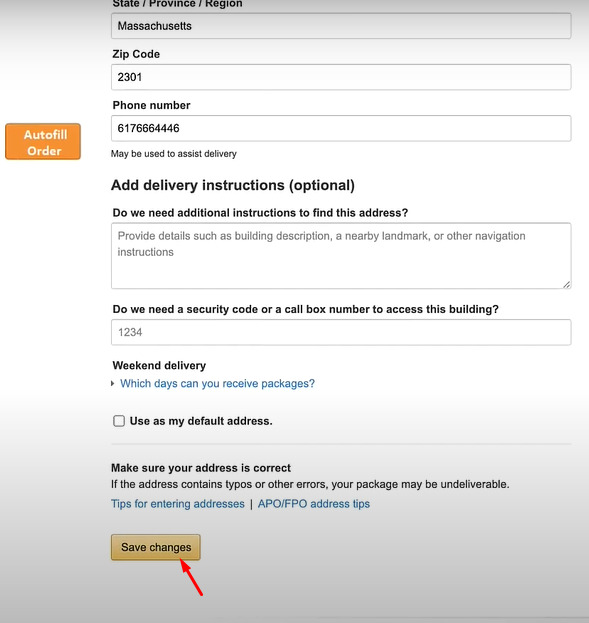
- Now click on Edit and Zonify will automatically fill in the customer’s details of the shipping address. Make sure to double-check the details before proceeding to the checkout page.
- Click on Save changes.
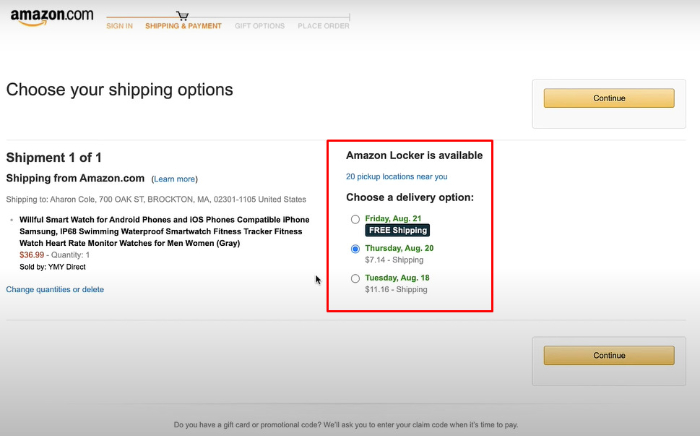
- Select the preferred delivery option. Various options are available depending on how soon you need the order. And then click on Continue.
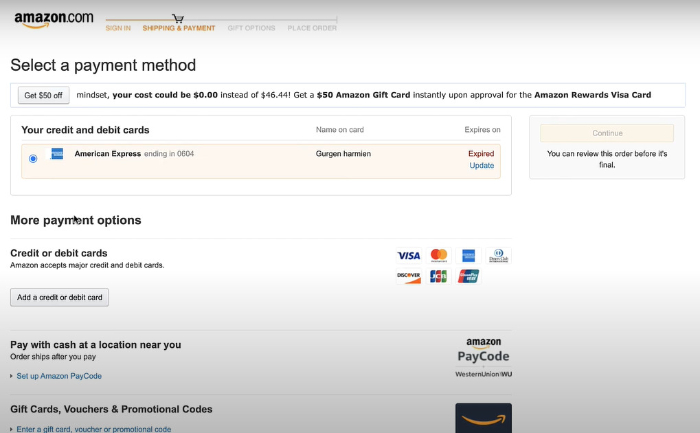
- Select the payment method that you want to utilize for the product’s payment and that will complete the process.
And that’s all you need to do to import your products from Amazon to Shopify.
How to Add Products to Shopify Home Page
It’s important that all of your products show up on your homepage. That doesn’t always happen and you need to tweak a few settings for that matter.
Here’s a guide on how to add products to Shopify’s homepage:
- Log in to your Shopify account and go to Products on the left bar.
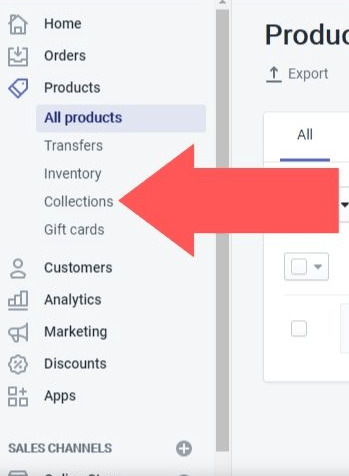
- Next, select Collections.
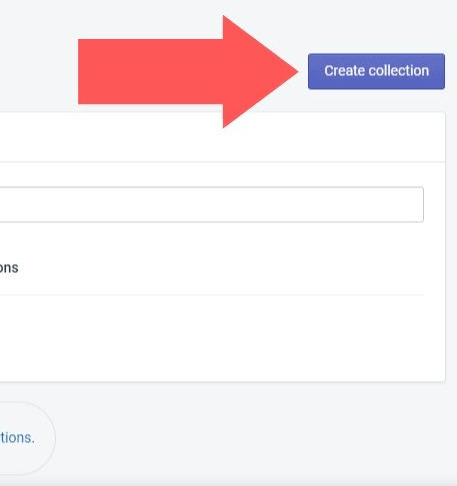
- On the right side of the page, click Create collection
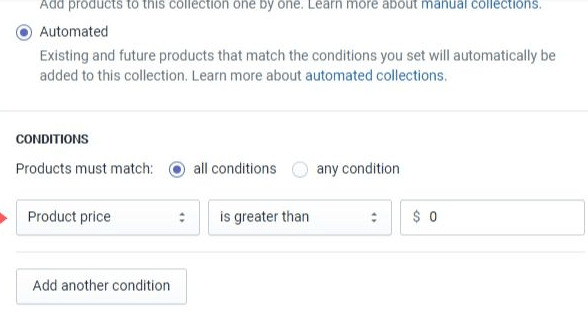
- Either choose the Manual or Automated option for Collection type.
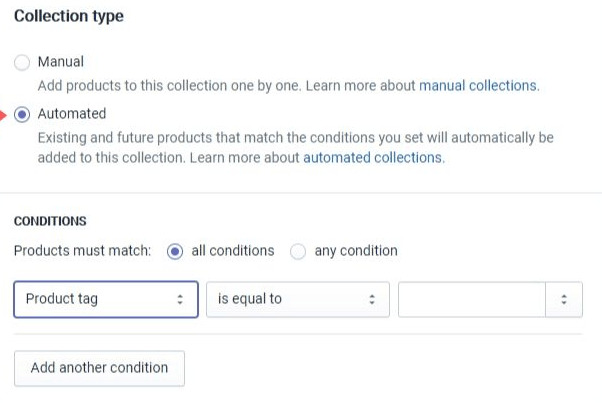
- In the case of the Automated option, select a Product price greater than 0 dollars.
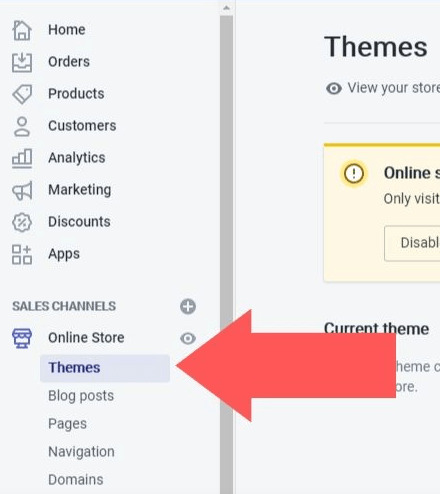
- Save your collection, go to the bar on the left side of the page, and select Themes.
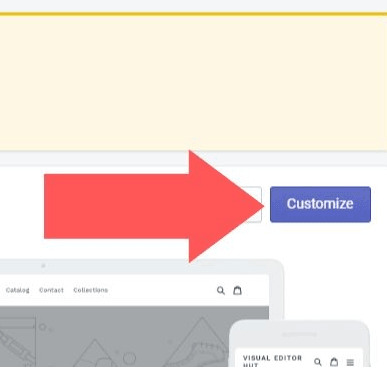
- Click on Customize on the right side of the page.
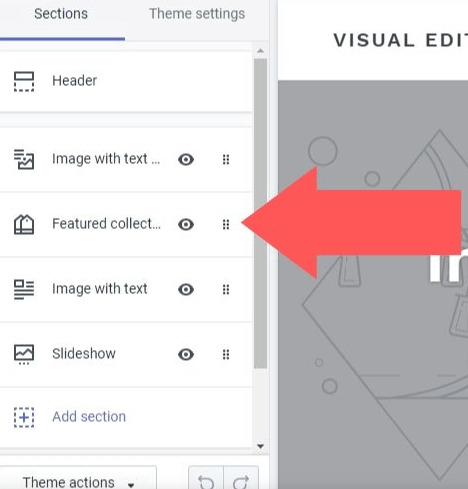
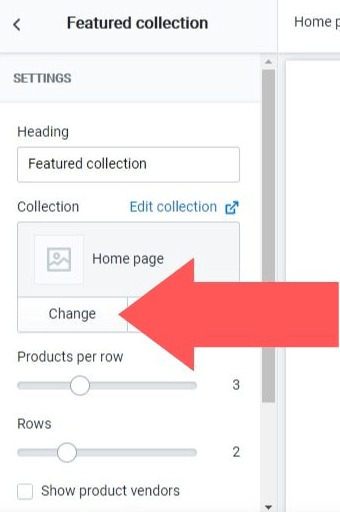
- Select Featured Collection on the left side of the page.
- In the Collection section under Featured Collection, select Change.
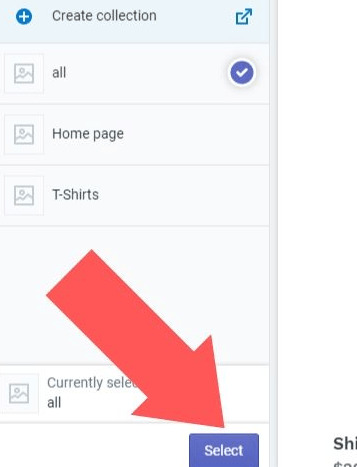
- Choose your collection and click Select.
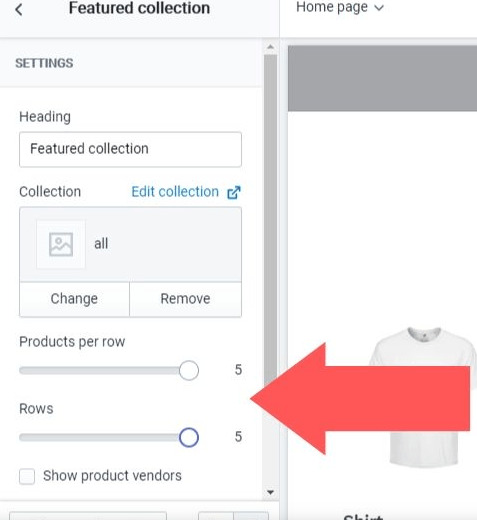
- Adjust rows and products per row under the Featured Collection section.
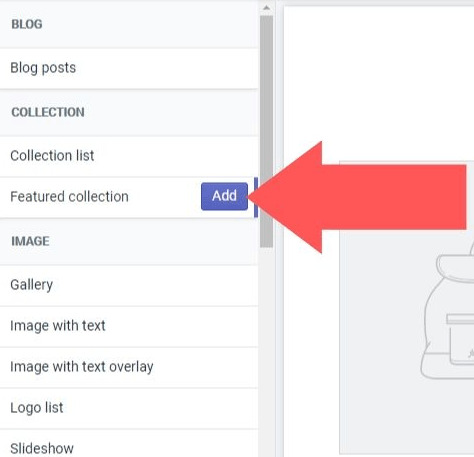
- In case you have more than 50 products, you will need to add multiple Feature Collections. To do this, when you’re on the step to Customize, click Add Section.
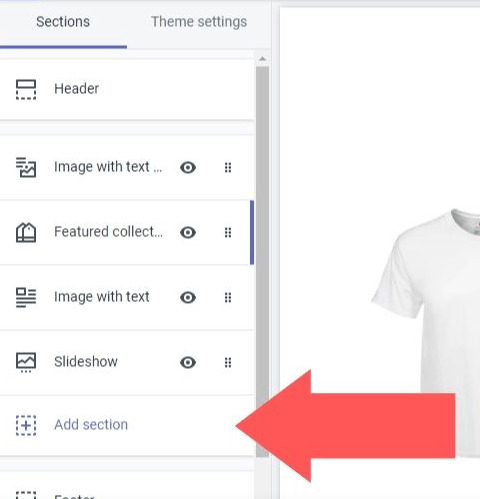
- Add your Featured Collections
- Click on Select Collections
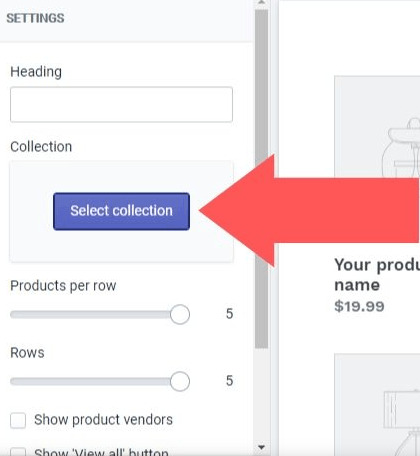
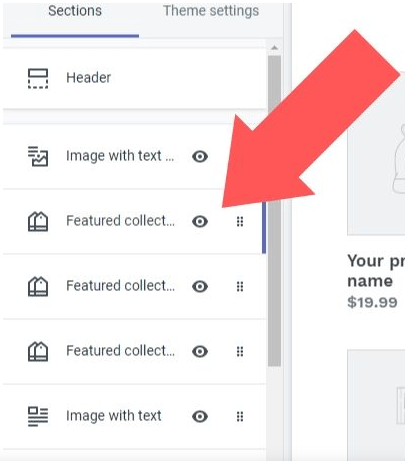
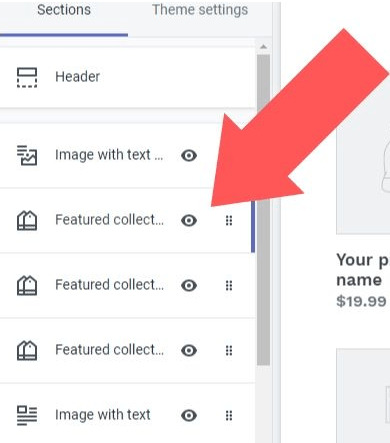
- Arrange your featured collections
- Choose a suitable heading
You’re all set, that’s all you needed to add products to the homepage of your Shopify store.
The Bottom Line
Shopify can take your business to new heights. Even though big brands like Tesla are on it, novice business owners have no reason to be intimidated.
Shopify is designed for people who are inexperienced with technical stuff. The user interface is easy to navigate and you can set up your products following up with a simple step-by-step guide.
To succeed on Shopify, the thing you need the most is not your technical skills but the passion you have for your online business. And in the end, it’s all about being consistent.
We got a good looking rank on 1 of best 100 eCommerce blogs on Feedpost.com, you can watch the list here.