
Are you a young entrepreneur who is just trying to be good at product photography? Do you want to make those product pics look more professional without spending loads of cash?
If you answered yes, you have arrived at the right place as we’re teaching product photography today.
The imagery on a website is crucial because that makes the first impression on your customer.
So that’s why why you want to make sure your site looks as polished and as professional as possible. One of the best ways to ensure that is through well-made product images.
Now, you may be thinking it’s impossible to get good shots without spending a ton of cash on equipment, but I assure you that’s not the case.
Keep reading for the best tips on budget-friendly product photography.
Table of Contents
Basics of the Product Photography Process
Whenever you’re starting something new, you always have to begin with the basics. They’re actually quite easy to remember and are also the key to creating high-quality photographs.
I will be taking you through some of the most important aspects of photography, that you have to keep in mind regardless of the size of your budget.
Setting Up A Proper Background And Product Placement
A proper background is key for a good product photography. My advice is to always use a white background for product pictures as the white really makes all other colors and the tiny details really stand out. White or light backdrops are also a must-have as they will simplify the editing process afterward.
Once you are done setting up the perfect background, you need to pay attention to the product placement.
You must look for the best way to present the key elements of the item and there are some important tips to remember:
- The product must always be in front of the background
- If you are photographing clothes, it’s best to use a mannequin that you can remove later
- Use hair clips or tape to attach small objects that can’t stay in place for a photo
Picking the Right Light for the Shot
If you know anything about product photography, you know that lighting can make or break a picture. Even though setting it up can be a long and tedious process, it’s one decisive factor that largely determines the quality of your photos.
When it comes to light, you generally have two options:
Natural Light
If you’re on an extremely tight budget, you have to make do with natural lighting. It’s very easy to manipulate and it can save you lots of trouble and money.
You must simply place your background next to a window where the light is coming through. From there, it’s your job to find the perfect angle to shoot from. If the light is too harsh, be smart and cover the window with white paper or cloth.
One tip here is to always shoot when the day is at its brightest as this gives you more light to work with.
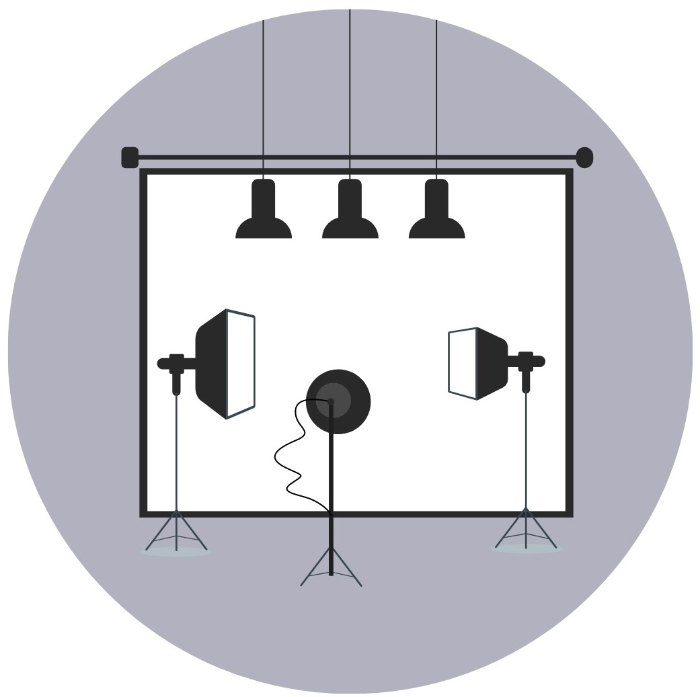
Studio Light
If you want to use artificial lighting, you will have to send some cash – a minimum of $30 for a set of lightbulbs. After that, you have to put your DIY skills to the test and create a box with the two lightbulbs clipped to its walls. If you are willing to spend a little bit more money, you can just go ahead and get two softbox setups from Amazon.
The idea here is to utilize one of the lights as a key light and the other as your fill or backlight, depending on the result you want to achieve in the end. As a matter of fact, studio lights give you more creative freedom as you’re able to manipulate them to your liking.
If you’re shooting for multiple hours, you will quickly get the hang of it and start getting more creative with lights and angles. In the long run, that will aid you in producing professional-looking images consistently.
Getting the Right Camera
If you’re really looking into minimizing cost, you should look to your smartphone as the camera equipment for the shoot. During the last few years, phone cameras have come a long way and they now have a lot of settings available, so much so that you’re left feeling like you’re working with an actual camera.

Should you want to spend some extra dollars on equipment? Well, you can look into purchasing a DSLR camera as their prices have been steadily dropping during the last few years.
If you decide to go with the smartphone, you gotta make sure you have the correct setup on the phone and you know how to use it along with all of its functionalities.
My advice is – do a couple of shoots for fun, play around with the camera, and look for some videos online that give tips on how to make the most out of your phone’s camera.
Don’t Forget That Post-Processing Matters
Remember, the photos you see in magazines didn’t look like that fresh out of the camera. To get a perfect, polished photograph, you need great post-processing.

In the beginning, photo-editing can be a tough and boring process, especially until you get the hang of it. But if you’re a beginner, shooting with a smartphone and editing properly is what can take your photographs from mediocre to incredible in a matter of minutes.
We can all thank the companies that produce great software that can be used for free, as that will be your holy grail for post-processing.
There are many great applications out there, so pick the one you like best and start learning how to use it. I’m sure you will be able to find a tutorial for every app on the internet.
All the Tools You Will Need for Great Budget-friendly Product Photography
Now that you already know the basic concepts for creating great imagery, you are probably wondering about what kind of equipment you will need.
I know we are on a budget, so I will only be showing you essentials and also be sharing a ton of DIY tips with you so that you can save a buck or two whenever possible.
Purchase A Stunning Background
I know I already told you about the importance of having a white background. But hey, I didn’t give you any options for buying or creating one.
If you’re going to shoot often, my suggestion is to look into some white background options to purchase off Amazon. I personally get a white sweep, preferably a paper one as it’s easier to change when it gets dirty. Besides, you can also look into getting white bounce cards made of foam board. They can be great whenever you are getting a lot of shadows and need some brightening.
Another tip here is to purchase a black foam board so that you can create an illusion of deeper shadows that will be particularly useful while shooting white objects.
In reality, foam boards are not that expensive and can be found in your local drugstore or on Amazon.
If you are really tight on money and you want to try some DIY, you will need only:
3 Things for Creating Your Perfect Background
- A chair
- White Paper
- RollClips
The idea here is pretty simple! Place the tips of the white roll at the top of the chair, clip them, and then let it fall. Doing so, you will seamlessly create a transition between the top and bottom halves.
A Designated Room
Light is the key to good photography as you have discovered that already. So whenever you’re picking a location for shooting, your best bet is to pick the room in your house with the highest amount of natural light. That would usually be a bright room with big windows.
Once you pick the best place to shoot, you will also need a table and a chair. You can then manipulate the placement of objects so that you can use the light that’s coming most effectively.
My advice would be – set up a small corner in your shooting room with all the essentials you need. That will save
you time the next time you have to do a shoot.
Tripod
Human hands get shaky, which leads to blurry or uneven pictures. That’s where tripods come to save the day.
It doesn’t matter whether you use a DSLR camera or a smartphone, Amazon offers tripods for both devices. Usually, they cost anywhere from $20 to $100 (for the cheap ones), so you won’t have to break the bank.

Tripods can be found for even cheaper on huge marketplaces like AliExpress or even down at your local store.
Of course, they aren’t something you can’t shoot without, they certainly up the quality of your work and make post-processing easier to do.
Proper Post-Processing Programs
I have already told you all about the importance of post-processing, so now is the time to really look into some useful software.
When it comes to photo editing, you can essentially go in two directions. You can either dedicate yourself to learning a more complex and usually paid-for software or you can choose to work with a free, easy-to-use program, that’s also a bit more limited in functionality.
Both options are valid and what you choose is based on your personal goals and needs. If you’re looking to take photos daily and their quality is crucial to the success of your business venture, then you should invest in great software. Here are the three applications that I personally recommend:
Adobe Photoshop CC
When it comes to photography, Photoshop can do almost everything that you can imagine. And even though Adobe took the controversial decision to make it a subscription software, it still remains unmatched in the business.
There are tons of features you can utilize and it has a slick and clean interface, still it’s not the complete package without Lightroom.
One downside to Photoshop is that it can be difficult to learn and you may need some time to adjust to the program and be able to utilize all of its different functionalities.
Adobe Photoshop Lightroom
Lightroom is Photoshop’s perfect partner in crime. It’s an all-in-one image cataloging, raw processing, and editing application. And if you simply need photo enhancement and not modification, you will do just fine by only using Lightroom.
Lightroom is available for both PCs, mobile devices, and it syncs beautifully through platforms. It’s tricky to learn and you will definitely have to spend some time looking at tutorials, but once you get the hang of it, you will certainly see major improvements in the quality of your photos.
Corel Paintshop Pro
This is what I would call the perfect budget-friendly photoshop. It has all the essentials of Adobe’s photoshop but costs a lot more and you can get it with a one-time payment instead of a subscription.
Corel keeps updating this application every year, adding more and more new features and now it’s certainly very close to Photoshop in terms of usability and functionality.
With Paintshop Pro, you also get a ton of help and tutorial videos that save you the trouble of searching. The only downside to this program is that it’s unfortunately not available for macOS.
Now, if you want to do shoots once a month or every couple of months, these programs are not worth the investment of time and money. For simple photoshoots, you can do good enough using free editing software. And these are my favorite apps:
Pixlr X
It’s a free, Photoshop-like app that’s available to use on mobile devices and PCs. It’s one of the first SAAS (software-as-a-service) programs for photo editing and super easy-to-learn tool for beginners.
Of course, it isn’t nearly as powerful and lacks many of the features of Photoshop but it’s great for beginners and some temporary photo editing.
Canva
Okay, so Canva isn’t really a photo editing application in the traditional sense. It’s more so a marketing tool for creating beautiful graphs and logos.
You can use it to put borders on photos or to add your logo in product pictures. It’s cheap, available across a multitude of devices and the premium version allows for many users to be working on it at the same time.
It’s one “must-have” app for every entrepreneur. By the way, it’s free version is more than enough!
Snapseed
This is one of the most popular free image-editing apps on the market. It has gotten a lot of hype over the years and there’s a reason for that.
Snapseed is easy to use and offers a ton of features related to editing and fine-tuning photos. Along with that, it offers the use of presets and allows users to change everything: from brightness to contrast, saturation, and much more.
For a free application, it offers everything you might need as a beginner and more. Another cool thing is that Snapseed can be used across multiple devices regardless of their operating system.
5 Tips For Creating Stand-Out Product Photography
Always Take Multiple Photos – No.1 Product Photography Tip!
If you’re going through all of the trouble for creating space and time to shoot, you must utilize it to the max. Take shots from different angles, get close, and then back away. Use the light in different set-ups and move the product around.
Get creative. Photography is an art, so be an artist. Take a variety of photos – some for the store, others for social media.
Don’t forget to take close-up shots that capture cool details and little quirks of the product. These types of images are what show the customer the uniqueness of the item and proves that you’re selling something of quality.
Getting too many photos shouldn’t be something you have to worry about. In fact, the more material you have, the better it is because you will be able to pick the best ones during the so-called post-production process.
Choose A Color Palette
Every successful brand has a specific color palette that makes them stand out. You usually see those colors used in their logo, their website, and in all product photographs.
If you really want to make an impression on your customers, you must identify the colors that fit their brand. Of course, that’s no easy task and it’s not just randomly picking some fun colors. It’s a tough job as you have to consider the color palette, which reflects your ideas and the feelings you want to provoke in customers.
An easy way to create a color scheme is through Adobe Color. You can start with one color and then expand using different color theories.
DIY for Product Photography As Much As You Can
Here’s the deal: If you want to save money, you have to sacrifice the time to do as much DIY as possible. And if you’re good with your hands (unlike me), you may also find the process of building tolls easy and enjoyable.
There’s a ton of equipment that you can craft instead of buying. Backgrounds can be made at home with a few simple materials, such as white paper and a chair. Lighting can also be done at home with good quality light bulbs and cardboards.
There’s a ton more you can craft with your hands and it will definitely save you a lot of dollars. This is especially true if you don’t shoot regularly and don’t need items for longer periods of time (DIY projects tend to fall apart rather quickly).
Turn Your Friends And Family Into Models
Way to Save Some Cash: Don’t hire professional models. Leverage your cool-looking friends.
Adding a human being to a photograph can be quite useful. It gives perspective to the size of the product or an idea of how it can be used. If you’re selling clothes, by having a real person wear them, customers can have a better idea of how the clothes look. Somehow, this heats up the desire to buy.
Hiring professional models can be a really expensive endeavor. So, I would advise you to go with your friends and family. I’m certain that you will find people who love getting their picture taken or who want to get some modeling experience under their belts.
Even the shyer ones that don’t want their face shown can be of help, as most of the time you won’t need to capture their faces in most cases.
By working with friends and family, you can also turn shoots into a fun event, where you all explore creative ideas together.
Be Honest
Product photography is descriptive in nature. Your product should look the way it does in real life – true to size and with its real colors and materials.
You also have to show it in context – if it’s a lamp, show people reading or turning it off before going to sleep.
In many places, there are ethical codes that forbid you from misleading customers. So always make sure that your product looks exactly as it does in real life. That also builds trust with the customers as they know they will get exactly what you are showing.
Final Words
Having well-photographed products is what can take your store from “just another online shop” to a professional-looking brand.
People always look for aesthetics, even unconsciously, and giving them something beautiful to look at helps in building a relationship that makes sure your company leaves a positive impression.
And look, you can do great product photography without spending too much money or in fact any money at all. All you need is creativity, dedication, and practice.
In the beginning, you may not get the results you imagined, so don’t get discouraged. Keep trying and you will get better.
Follow the tips in this article for a ton of ideas on how to save money and learn to capitalize on your creativity.


1 comment
This is one of the best posts I have read. It is good to check things from a professional perspective without a lot of trivial detail. However, I would much appreciate it if you could provide a comprehensive video lesson on how you edit in Photoshop 🙂 Thank you so much, Michael!