Are you looking for a Shopify app that creates stunning image and video galleries for your store? If yes, the Image gallery video Shopify app creates images and video galleries for any of your store pages.
These galleries are aesthetically pleasing to anyone who lands on your store. As a matter of fact, these are more than just a beauty to an eye for customers. And for you, these can increase sales to a great extent.
So let’s just look at how to create these galleries with the image gallery video Shopify app, its pricing, and why every dropshipper should have this gem.
Table of Contents
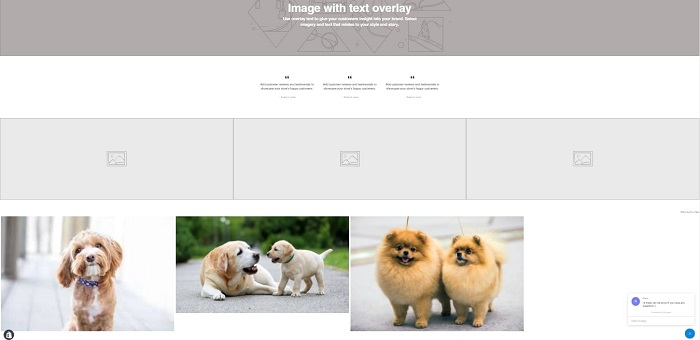
A Step-by-Step Guide for Image Or Video Gallery Creation
As soon as you go to the app’s sections and click on the Image gallery video Shopify app, you will reach the dashboard.
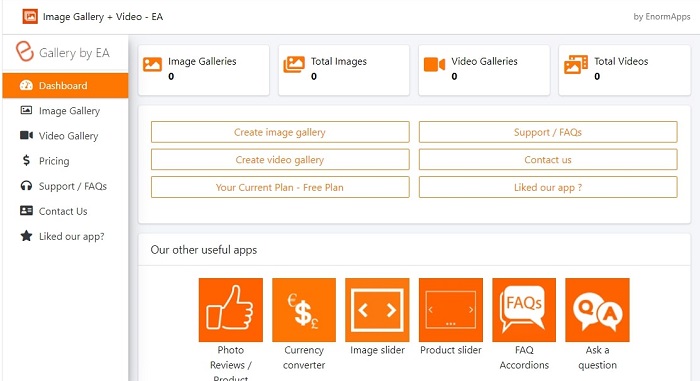
On the app’s dashboard, you have several features to access.
- See how many image galleries are active
- Total images in all the galleries
- Active video galleries and the total number of videos
- Create an image/video gallery
- Clear your doubts via the FAQs section
- Contact the support
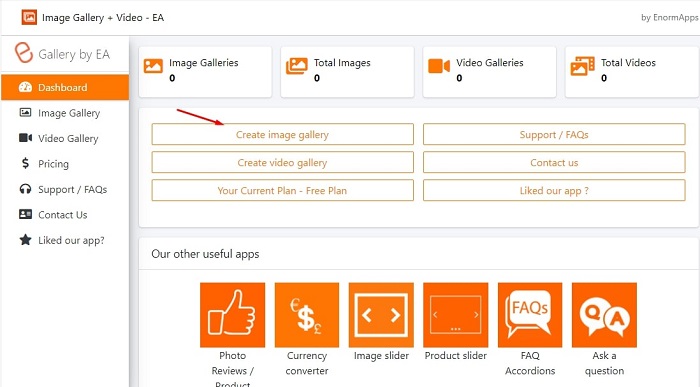
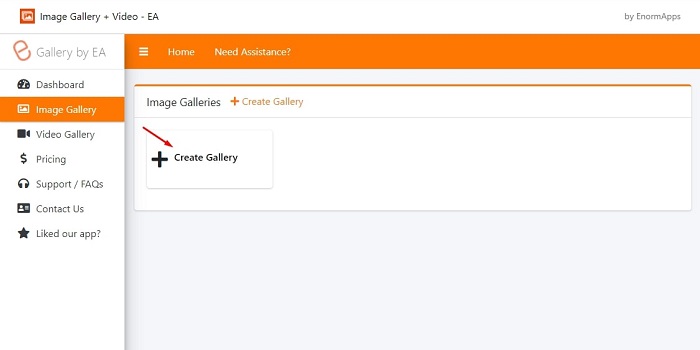
Step 1: To create an image gallery, click on the “Create image gallery” button you see on the dashboard.
Step 2: Click on “Create image gallery” icon.
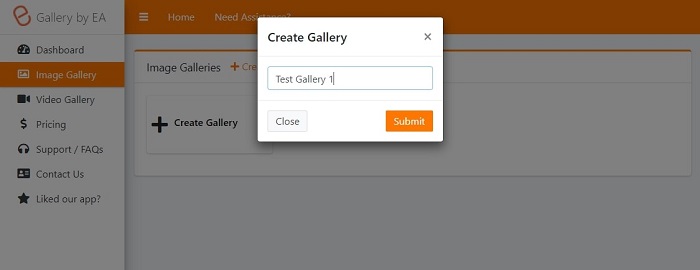
Step 3: Name the gallery and click on the “Submit” button.
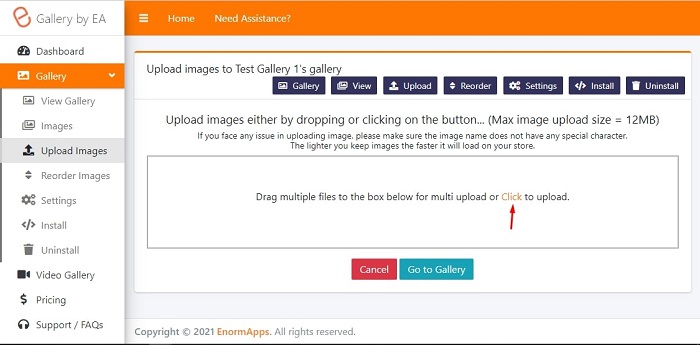
Step 4: Now you will see the main image gallery dashboard. You can drag and drop images in the gallery or upload the images from your device via the “Click” button.
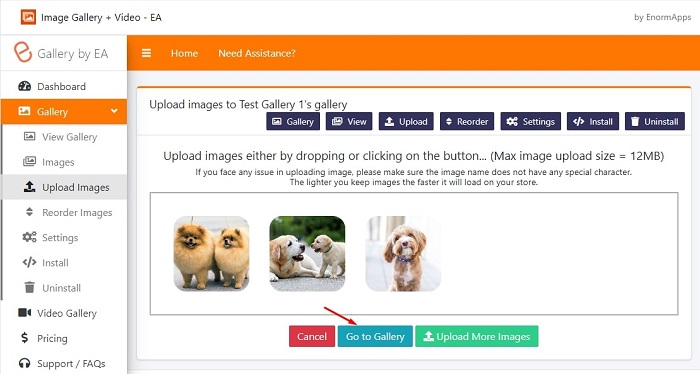
Step 5: Once you’re done uploading images, click on the “Go to Gallery” button.
Step 6: In the next section, you can enter the image information.
- Caption each image
- Put alt tag for images
- Link the image to any page you want
- Edit or delete the image
As you can see, there are a bunch of options on the top bar. Just remember, these are a crucial set of tools.
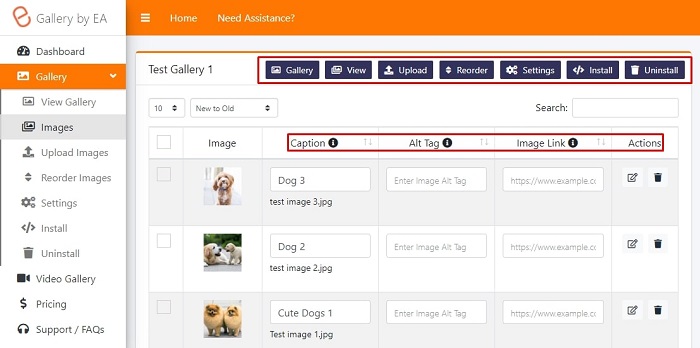
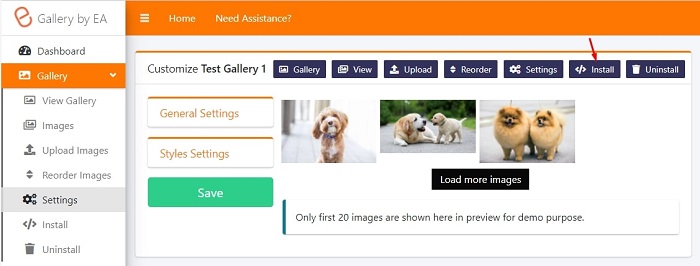
Click on the Settings button from the top bar if you wanna edit your image gallery.
Step 7: In the settings section, you can see the preview of your gallery. There are several things you can change in your gallery from the left sidebar features:
General Settings Drop-Down
- Select the display mode – Popup Display or Inline Display
If you wanna have a pop-up, you can:
- Change the color of the pop-up background and opacity of the pop-up
- Change pop-up caption color, image border-radius, image border width, and the border-color
If you go with the inline display, you can change:
- Image order
- Image display style
- Image quality
- Number of images in a row for desktop and mobile
- Display or hide the image gallery name, change the title color, and size of the text
- Choose if you wanna open the image link in the new window or the same
- Show or hide download button
- Enable or disable right click
- Enable or disable pagination
- Set images per page
- Set how to load more images – Load more button or automatically on scroll
Styles Settings Drop-Down
To customize your images, leverage the ‘Style’ settings and play with:
- Image gutter specification
- Image border-radius
- Enable or disable border-radius
- Set image hover effect
- Specify image overlay opacity
- Set image over text option
- Choose the image overlay color and the image font color
Once you’re done, hit the ‘save’ button.

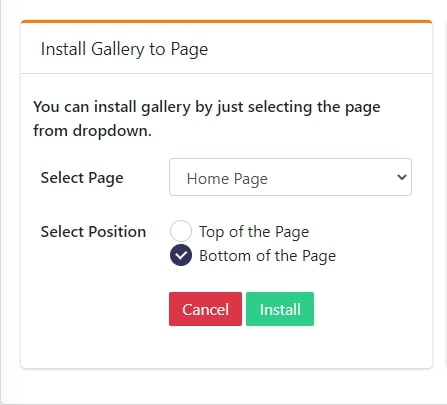
Step 8: To publish your image gallery on your Shopify store, click on the ‘install’ button from the top bar.
Step 9: The install tab will have 2 options:
- Install gallery to page – Select the page you want your gallery to be displayed on. More importantly, whether you want it on the top or bottom. Done? Click on the ‘install.’
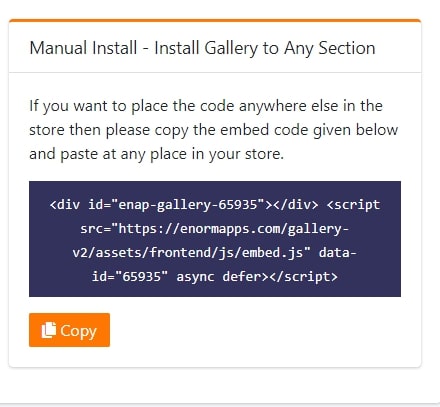
- Manual install – Install gallery to any section of the page you want.
For this, all you wanna do is copy the given code and head over to the theme panel so that you can select the custom HTML tab and paste the code there. Once it’s done, you can then place the custom HTML tab anywhere on the page.
Step 10: There you go, your image gallery is installed on your Shopify store. Yay!
In order to create the video gallery, you have to follow the exact same steps mentioned above. Feel free to try it out!
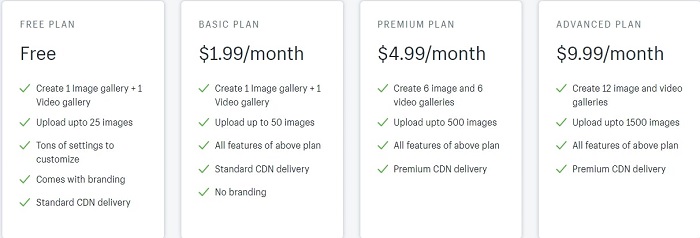
How Much Does Image Gallery Video Shopify App Costs?
Image gallery video Shopify app comes with a free plan and 3 paid plans. The free plan lets you create an image and video gallery. So test out the video image gallery, if it pleases you, just go ahead and subscribe to the any paid plan you like.

Is the App Worth Trying?
Galleries are often a part of the Shopify app that brings beauty with it. Along with beauty, you can also drive sales, linking your image to the product page.
Having an app for creating stunning galleries is a must. But, is the image gallery video Shopify app the one for you?
What I like the most about it is – you can turn your simple images into a gallery that converts. I would say you should give this platform a try.